Pi Zabbix Network Management System (NMS)
Monitor anything
Get a single pane of glass view of your whole IT infrastructure stack
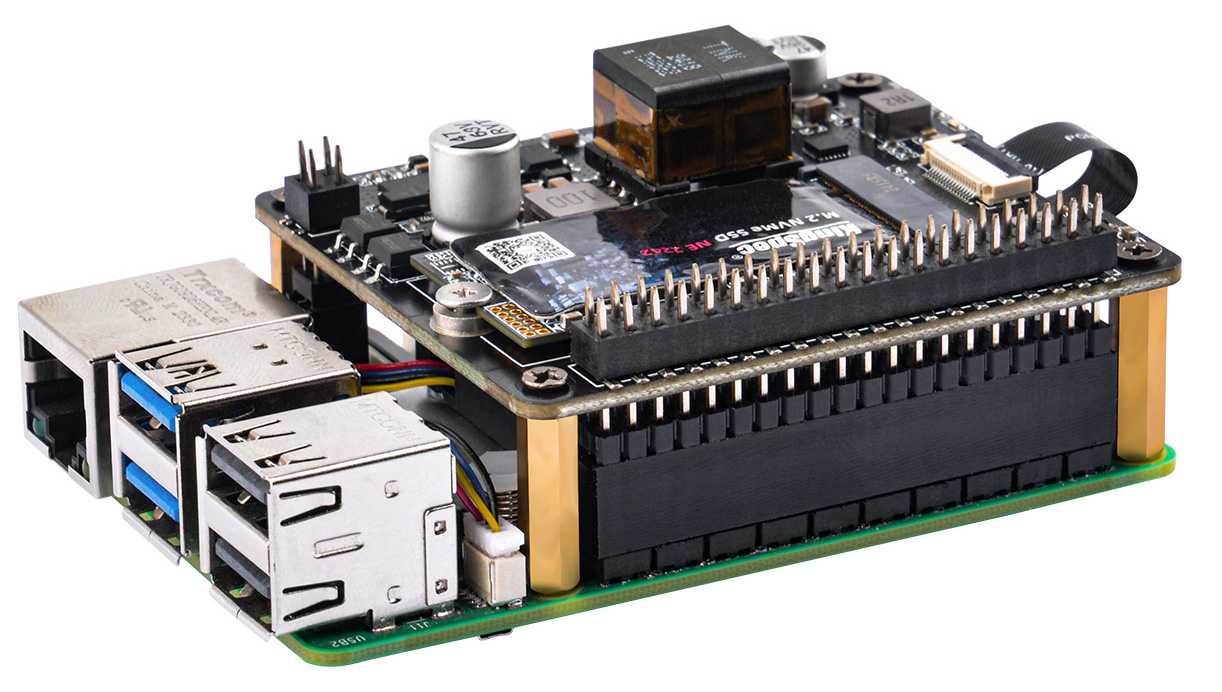
| Board version: | Pi 5 B Rev 1.0 |
| Memory: | 8 GB |
| RPi OS version: | Lite 32-bit |
| Cooling: | Active (Raspberry Pi Active Cooler) |
| HAT: | 52Pi M.2 NVME & PoE+ EP-0240 |
| M.2 NVMe SSD: | Transcend MTE400S - 512 GB |
| Site: | https://www.zabbix.com/ |

Zabbix on to a Raspberry Pi
Zabbix is a popular open-source monitoring software tool for a wide range of things, such as networks, servers, and virtual machines. You can even use Zabbix to monitor your Raspberry Pi’s CPU load, network utilization, disk space consumption, and more. Additionally, we will also be choosing to set this software up with NGINX as the backend web server.
Basic installation OS
Preparing your Raspberry Pi for Zabbix server
Installing Zabbix to the Raspberry Pi
Installing NGINX Web server
We should also run the following command to uninstall Apache2 since there is a chance that it is pre-installed on your system:sudo apt remove apache2
install NGINX onto our Raspberry Pi by running the following command on your Raspberry Pi:
sudo apt install nginx
Now with NGINX installed, we can now start up the software.
Type the following command into terminal to start up the web server on your Raspberry Pi:
sudo systemctl start nginx
With the NGINX web server now started up we should now grab our local IP address.
Just go to the local IP Address that you obtained using hostname -I.
Once you browse to the address you should see something like Welcome to nginx!
Configuring NGINX for PHP
Before we get started with configuring PHP for NGINX, we need to go ahead and install PHP it and some recommended PHP modules that will make it easier when dealing with more extensive PHP scripts. You can install everything by running the command below:sudo apt install php8.2-fpm php8.2-mbstring php8.2-mysql php8.2-curl php8.2-gd php8.2-zip php8.2-xml -y
With PHP-FPM now installed we can make the required modifications to the default NGINX configuration file.
To begin editing the default configuration file run the following command on your Raspberry Pi:
sudo nano /etc/nginx/sites-enabled/default
Within this file, find and replace the following lines.
Find:
index index.html index.htm;
Replace With:
index index.php index.html index.htm;
Here we need to add index.php to the index line, and this tells NGINX to recognize the index.php file as a possible index, adding it first in the list means it will be selected over an index.html file.
Find:
#location ~ \.php$ {
#       include snippets/fastcgi-php.conf;
#
#       # With php5-cgi alone:
#       fastcgi_pass 127.0.0.1:9000;
#       # With php5-fpm:
#       fastcgi_pass unix:/var/run/php5-fpm.sock;
#}
Replace With:
location ~ \.php$ {
    include snippets/fastcgi-php.conf;
    fastcgi_pass unix:/var/run/php/php8.2-fpm.sock;
}
This code sets up NGINX to process .php files by passing them through to PHP-FPM.
Once done, you are able to save and exit by pressing CTRL + X and then pressing Y and then ENTER.
Next, we will need to tell NGINX to reload its configuration by running the following command:
sudo systemctl reload nginx
Finally, let’s test the PHP setup by writing a very simple index.php file in our /var/www/html directory. Run the following command to create and begin editing our index.php file:
sudo nano /var/www/html/index.php
To this file, add the following line of code:
<?php phpinfo(); ?>
Once that is all done, we can save and exit by pressing CTRL + X then Y and lastly ENTER.
Now like earlier in the tutorial you can go to your Raspberry Pi’s IP address, this time however you should see a page showing all the information about your version of PHP and what modules are currently active. It is a good indication that your PHP installation is up and running correctly.
Installing MySQL database server
Installing MySQL to the Raspberry Pi is a simple process and can be done with the following command:sudo apt install mariadb-server
With the MySQL server software installed on the Raspberry Pi, we will now need to secure it by setting a password for the root
user.
By default, MySQL is installed without any password configured, meaning you can access the MySQL server without any authentication.
Run the following command to begin the MySQL securing process:
sudo mysql_secure_installation
Just follow the prompts to set a password for the root user and to secure your MySQL installation.
For a more secure installation, you should answer Y
to all prompts when asked to answer Y
or N
.
These prompts will remove features that allows someone to gain access to the server easier.
Make sure you write down the password.
Now, if you want to access your Raspberry Pi’s MySQL server and start making changes to your databases, you can enter the following command:
sudo mysql -u root -p
You will be prompted to enter the password that we just created for MySQL’s root user.
Note: Like most Linux password inputs, the text will not appear as you type.
You can now enter MYSQL commands to create, alter, and delete databases. Through this interface,
you can also create or delete users and assign them the rights to manage any database.
There are two different ways you can quit out of the MYSQL command line.
The first of those is to type quit;
into the MySQL interface.
The other way of quitting out of the MYSQL command line is to press CTRL + D.
At this point, you will now have successfully set up MySQL on your Raspberry Pi. Our next few sections will go into making better use of this database.
Installing Zabbix to the Raspberry Pi
Now that we have done some preparation, we can finally move on to install the Zabbix software to your Raspberry Pi.Our first task is to add the Zabbix server repository to our device.
We can start this process by using wget to download the Zabbix 7.0 LTS Debian package to the Raspberry Pi.
(Zabbix download site)
Please note, the version we are downloading with this command is for Raspberry Pi Bookworm (12).
wget https://repo.zabbix.com/zabbix/7.0/raspbian/pool/main/z/zabbix-release/zabbix-release_latest_7.0+debian12_all.deb
Once the package downloaded. We can use the dpkg tool to install it.
Run the following command to install this package to your Pi:
sudo dpkg -i zabbix-release_latest_7.0+debian12_all.deb
As we have made changes to the repository sources, we need to rerun an update.
If we do not run this update, the operating system won’t be aware of the new Zabbix packages.
sudo apt update
Finally, we can install the Zabbix server, frontend and agent.
Running the following command will get us everything we need for Zabbix to run on our Raspberry Pi:
sudo apt install zabbix-server-mysql zabbix-frontend-php zabbix-nginx-conf zabbix-sql-scripts zabbix-agent
Create initial database
Make sure you have database server up and running. Run the following on your database host:sudo mysql -uroot -p
If prompted, enter the password for your root MySQL account.
For our first step, we will create a new SQL database.
Run the following command within the MySQL CLI to create the database:
mysql> create database zabbix character set utf8mb4 collate utf8mb4_bin;
Next, we need to create a user called zabbix
that will be used to access the new database.
Before entering the following command, make sure that you replace PASSWORD
with a unique and strong password of your choosing:
mysql> create user zabbix@localhost identified by 'password';
Finally, with both the user and database created, we need to grant some privileges:
mysql> grant all privileges on zabbix.* to zabbix@localhost;
Enable log_bin_trust_function_creators option:
mysql> set global log_bin_trust_function_creators = 1;
To exit, all you need to do is type in quit;
and press the ENTER key:
mysql> quit;
On Zabbix server host import initial schema and data. You will be prompted to enter your newly created password:
zcat /usr/share/zabbix-sql-scripts/mysql/server.sql.gz | mysql --default-character-set=utf8mb4 -uzabbix -p zabbix
Disable log_bin_trust_function_creators option after importing database schema.
sudo mysql -uroot -p
mysql> set global log_bin_trust_function_creators = 0;
mysql> quit;
Configure the database for Zabbix server
Edit file /etc/zabbix/zabbix_server.conf:sudo nano /etc/zabbix/zabbix_server.conf
To search for this line quickly, you can use the CTRL + W shortcut:
DBPassword=
Replace that line with the following.When typing this line in, replace
PASSWORDwith the password you set up for the
zabbixSQL user:
DBPassword=PASSWORD
If you are using nano, you can save and quit by pressing CTRL + X, then Y, followed by the ENTER key.
Configure PHP for Zabbix frontend
Edit file /etc/zabbix/nginx.conf uncomment and setlistenand
server_namedirectives:
# listen 8080;
# server_name example.com;
sudo nano /etc/zabbix/nginx.conf
Like this:
listen 8080;
server_name PiNMS;
Start Zabbix server and agent processes
Start Zabbix server and agent processes and make it start at system boot:sudo systemctl restart zabbix-server zabbix-agent nginx php8.2-fpm
sudo systemctl enable zabbix-server zabbix-agent nginx php8.2-fpm
Open Zabbix UI web page
The URL for Zabbix UI when using Nginx depends on the configuration changes you should have made:http://[IPADDRESS]:8080
Make sure you swap out [IPADDRESS] with the local IP of your Raspberry Pi.
When you open the Zabbix web interface for the first time, you will be greeted with a welcome screen. Enter the user name Admin with password zabbix to log in as a Zabbix superuser. Access to all menu sections will be granted.