PC-Engines APU2 boards for embedded applications
With pfSense firewall/router
End-of-life PC-Engines:
After a long production run, AMD will accept last orders for the SOC used in our apu2/3/4/5/6 boards by end of June 2023.
I would like to thank all of our customers for their business, and sometimes patience.
https://www.pcengines.ch/eol.htm
Although not used in the same manner as the Raspberries and microcontrollers, it is still an embedded system.
These boards (APU & APU2) do not have any KVM in/output at all. If you have to do something to the system, you have to log in via the serial console.
Actually, some of the Alix boards do have VGA.
When I wanted to experiment with vlans, I was looking at different hardware and I bought an Ubiquiti 24 ports EdgeSwitch Lite managed switch. Passively cooled and Layer-3 lite capable. But the ACL functionality was limited to ten rules per vlan. That didn't work out for me.
I started searching again and came across PC Engines
from Switzerland.
And man, what a nice embedded boards they have. So I bought a complete set online.
Which comprised of the following:
- APU-2 board (APU 2c4)
- 16GB mSATA SSD
- 12 Volt power adaptor
- Aluminium enclosure
All in all, I think it is money well spent! pfSense is easy to configure. The devices are noiseless and the tempertures of both devices stay within normal limits.
APU 2c4 board specs
- CPU: AMD Embedded G series GX-412TC, 1 GHz quad Jaguar core with 64 bit and AES-NI support, 32K data + 32K instruction cache per core, shared 2MB L2 cache
- DRAM: 4 GB DDR3-1333 DRAM
- Storage: Boot from m-SATA SSD, SD card (internal sdhci controller), or external USB. 1 SATA + power connector
- 12V DC, about 6 to 12W depending on CPU load. Jack = 2.5 mm, center positive
- Connectivity: 3 Gigabit Ethernet channels (Intel i211AT)
- I/O: DB9 serial port, 2 USB 3.0 external + 2 USB 2.0 internal, three front panel LEDs, pushbutton
- Expansion: 2 miniPCI express (one with SIM socket), LPC bus, GPIO header, I2C bus, COM2 (3.3V RXD / TXD)
- Board size: 6 x 6" (152.4 x 152.4 mm) - same as apu1d, alix2d13 and wrap1e
- Firmware: coreboot
- Cooling: Conductive cooling from the CPU to the enclosure using a 3 mm alu heat spreader (included)
Installing pfSense
Steps overview:- Put the APU2 together (board in enclosure, mSATA drive installed etc)
- Download memstick-serial release of the operating system you want to install
- Copy the image on the USB drive
- Connect the USB drive and serial cable to APU board
- Start putty and connect
Download image for pfSense
- Go to the pfSense website download section
- Look for
Select Image To Download
- Version - Latest version (not selectable)
- Architecture - Select: AMD64 (64-bit)
- Installer - Select: USB Memstick Installer
- Console - Select: Serial
- Mirror - Select one closest to you
- Click the Download button
Copy pfSense image on the USB drive
- Use Etcher to copy image to USB drive
Connect serial and USB drive
Please note, you need a null-modem cable! Do not use gender changers!
Nowadays you probably will use an USB-to-serial cable. Which will not fit the APU because the APU and your USB-to-serial cable both have male DB9 connectors. I made my null-modem cable myself. If you're not able to make one yourself, buy one. If you want to make one yourself as well, here is the schema:
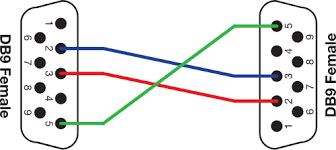
| Connector 1 | Connector 2 | Function |
|---|---|---|
| 2 | 3 | Rx 🠈 Tx |
| 3 | 2 | Tx 🠊 Rx |
| 5 | 5 | Signal ground |
Start Putty and connect
If you use Windows, please check in the Device Manager which serial port you have to use.Use Putty:
- Select Serial
- Serial line: your COM port
- Speed: 115200 baud
- At this time you should have the USB drive inserted and the serial + null-modem cable connected to the APU
- Start your serial session on your pc/mac/nix etc device
- Power up the APU
- Hold your finger at the F10 button to get in the boot menu to select your boot device (mSATA SSD in this case)
- Follow the instructions, install pfSense onto the mSATA SSD drive
- If you've done, the next time the APU starts up, it will automaticly starts up from mSATA drive
- And don't forget to take out your USB drive...
You're done now and can log in into the pfSense web GUI to configure your pfSense.
Some images of the APU 2c4
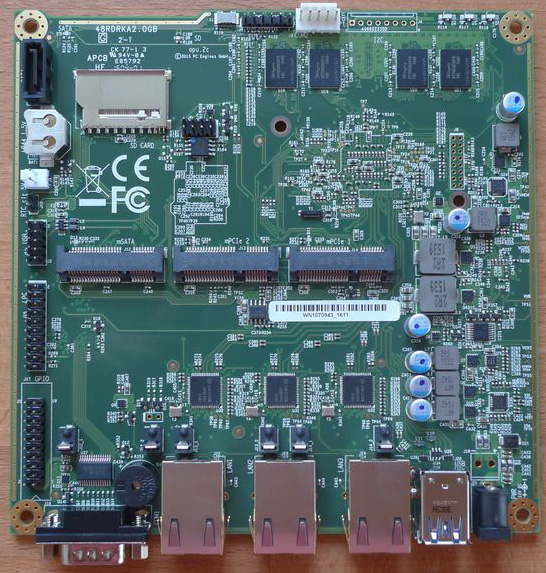
Top view of the APU 2c4
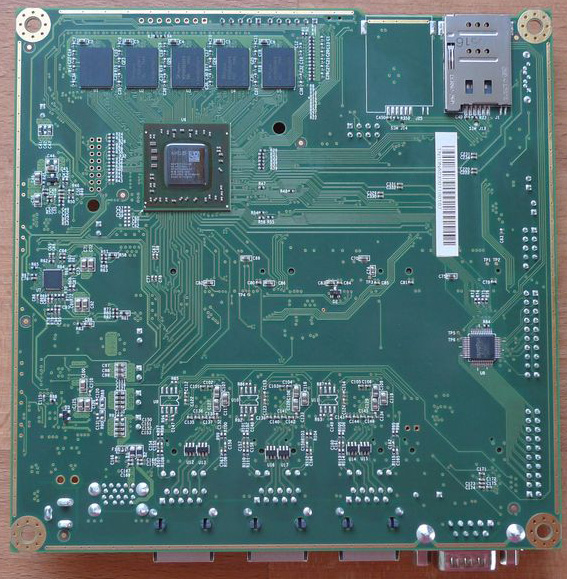
Bottom view, here you can see the AMD processor
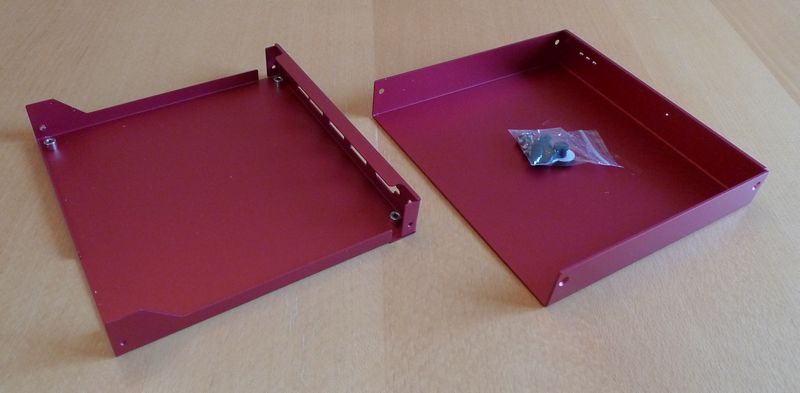
The aluminium enclosure, I chose a red one. Maybe black is a better option for heat dissipation.
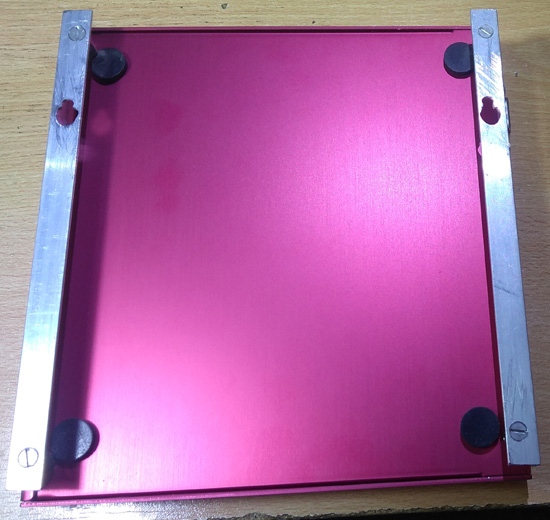
Bottom view, I made some modifications. Two rails for wall mounting the enclosure.
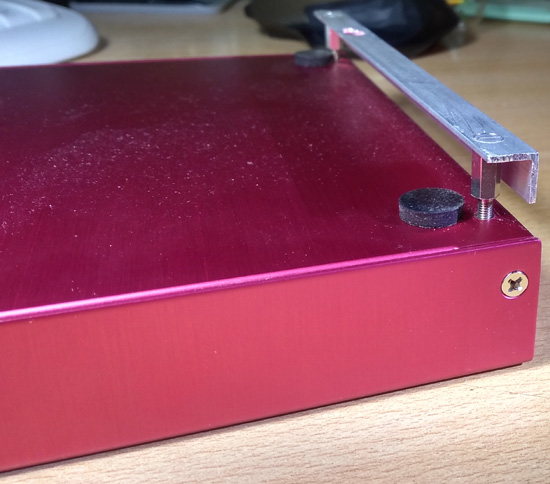
Close up, L-profile on M3x10 standoffs. The standoffs are screwed into rivnuts,
(which are a part of the enclosure to secure the APU board into the enclosure).
This way you get more airflow between enclusure and wall.
Remember, the CPU is at the bottom of the APU board and thus at the bottom of the enclosure.
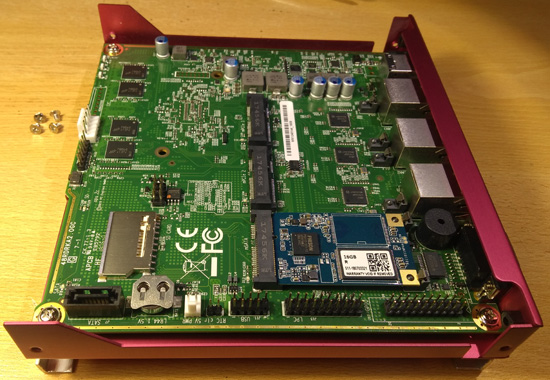
Inside the enclosure: the APU 2c4. The mSATA is at the bottom right. Two empty mPCIe slots above it. You can insert a WiFi module in one of them.
The enclosure has two holes for the antenna connectors at the back. A little LR44 battery on the bottom left, for the BIOS.